Getting Started
To start using Pikaview in your Ignition environment, follow the steps outlined below.
Install Dependencies
Pikaview relies on a couple third party Python libraries for its core functionality. Before proceeding, you should familiarize yourself with the process of installing third party Python libraries from the official documentation. Refer to Importing and using third party Python libraries in Ignition for more information related to Ignition specifically.
These dependencies must be installed on every Gateway that Pikaview will be configured on.
For each of the following resources, simply use the "download files" button on the pypi page, and then follow the manual instructions above to install the library. Do not attempt to use pip as the pypi page will instruct.
pypika
pypika is the core python library for Pikaview, as it allows for a programmatic way to generate SQL queries in various languages.
Download: https://pypi.org/project/PyPika/0.28.1/
Learn More: https://pypika.readthedocs.io/en/stable/
This exact version must be used, as newer versions of pypika transitioned to Python 3 and are not compatible with Ignition.
aenum
aenum is a requirement of pypika, as it is used for some of the internal enumerations.
Download: https://pypi.org/project/aenum/2.1.2/
Learn More: https://github.com/ethanfurman/aenum
Import Resources
After downloading the Pikaview files from the Exchange, the resources and their corresponding projects should be imported into your Ignition Gateway(s). For detailed information on how to import projects into a Gateway, see the official documentation.
Exchange-Pikaview
This is the core Pikaview project. It is recommended that you configure this project to be inheritable and inherit it in your own projects.
Exchange-PikaviewConfiguration
This is the configuration project, used to provide a Perspective interface for managing metadata. See Metadata Configuration to learn more.
Here is an example of what the fully imported projects might look like:

Basic Configuration
Configure Settings File
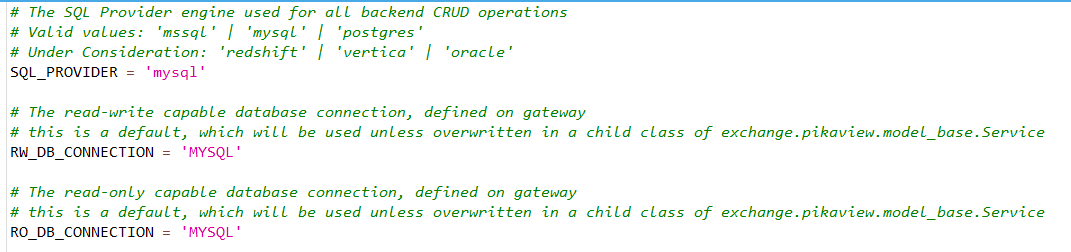
After installing the dependencies and importing the project resources, there are some values in the exchange/pikaview/settings script file that need to be manually set.
The value of SQL_PROVIDER should be set to a valid string which corresponds to the database engine type you intend to connect to. Refer to the list of supported database engines on the overview page for a complete list of valid values.
As of the current release, only one database engine type can be used at a time.
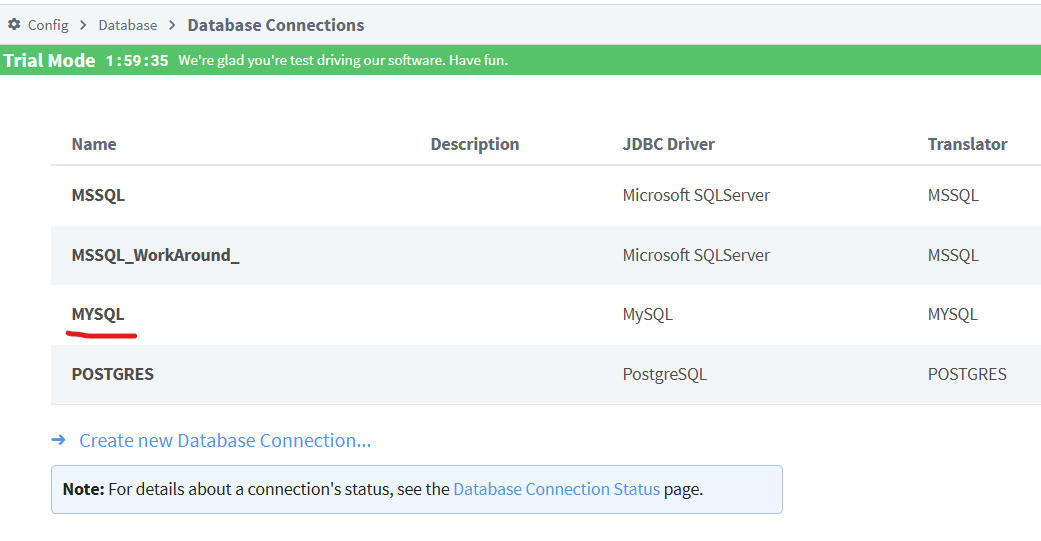
The values of RW_DB_CONNECTION and RO_DB_CONNECTION should be set to valid strings which correspond to database connection names configured on the Gateway. These values will be used by the Pikaview scripts internally to store and retrieve metadata, they will not be used by the service classes in order to retrieve table data, those connections are determine in a separate step, refer to the Metadata Configuration Steps for more information.
These values are split into RW (read-write) and RO (read-only) versions to provide flexibility for usage with load-balancing and other optimzation considerations. It is still recommended and expected that each connection will provide access to the same set of schemas/databases. If such optimizations aren't needed, the string value for both properties can be the same database connection.
The value for MODELS_ROOT_FOLDER needs to be set to a string, which includes the folder path containing all concrete Service Classes that will be implemented. Refer to the documentation on extending the Base Classes to see more information.
The value for METADATA_TABLE needs to be set to a python dict, which corresponds to the schema/database name where Pikaview will store its own internal Metadata tables. Refer to the documentation on Metadata Configuration for more infomation. This schema should be accessible by the connections defined in RW_DB_CONNECTION and RO_DB_CONNECTION above. An example of a valid value for this property is shown below:
 METADATA_TABLE = {
        'schema': '<db_name>'
   }
Generate Metadata Tables
After setting all relevant properties in the settings file, the internal Metadata tables need to be created. There is both an automated and manual process for doing this, both of which are described below.
To create these tables automatically, you can run the following in a Designer's script console:
exchange.pikaview.metadata.service.createMetadataTables()
This script will create all of the necessary internal tables into the schema/database specified by the value in METADATA_TABLE in exchange/pikaview/settings.
This script assumes the database connection specified by RW_DB_CONNECTION in exchange/pikaview/settings has the appropriate permissions needed to create and alter tables within its relevant schema.
To create the tables manually, the SQL statements needed to create the tables can be found in the Named Queries defined in the path: Named Queries/Exchange/Pika View/Metadata/Create Tables/<Database Engine>. You must choose the correct subfolder that corresponds to the database engine type you are attempting to create the tables within.
For engines that require multiple queries, the order these should be run in as as follows:
Create Connection TableCreate Schema TableCreate Tables TableCreate Config TableCreate Column Table
Next Steps
After the basic installation is complete, refer to the steps to generate a metadata configuration for a database table.